When the December Cocoa Daisy Planner kits arrived I decided to dissect the pretty planner clips and turn them into charms. Unfortunately, I'm not much of a clip person, so I needed to find another use for them. I didn't want these pretties to just sit in my box but get a different use out of them.
Here is the charm made from the beautiful bow clip. I gently opened the faux leather band that held the bow together, took out the paper clip, added a jump ring instead and used E6000 glue to glue it all back together. In this photo you can see the "multi-charm attacher", this is two lobster clamps attached together with a jump ring. This way you can swap out the charm easily and only need two clamps.
I also made a charm from the fluffy snowball clip. I took out the paper clip which was attached to the snowball using hot glue. The hot glue didn't come off easily, so I left it in and punched a hole in there. This way I was able to attach a ring and done.
This is my third (or fourth) charm made from the puffy clip toppers. And I love these kinds of charms.
Finally, the last one. This is the charm I am using on my planner right now. Carefully peeled off the attached clip, punched a hole at the top right corner, added a ring and then added some string. I since swapped out the string for the "multi charm attacher" that you can see in the close up photo of the bow charm.
I filmed my whole process of transforming the clips into charms however something went wrong when I transferred the video clip onto my computer and it got stuck half way through. Here is the failed video, I tried to explain it a bit more detailed than in this post.
Showing posts with label planning. Show all posts
December 11, 2017
September 6, 2017
Planning and Memory Keeping: September Setup - Cocoa Daisy and foxyfix
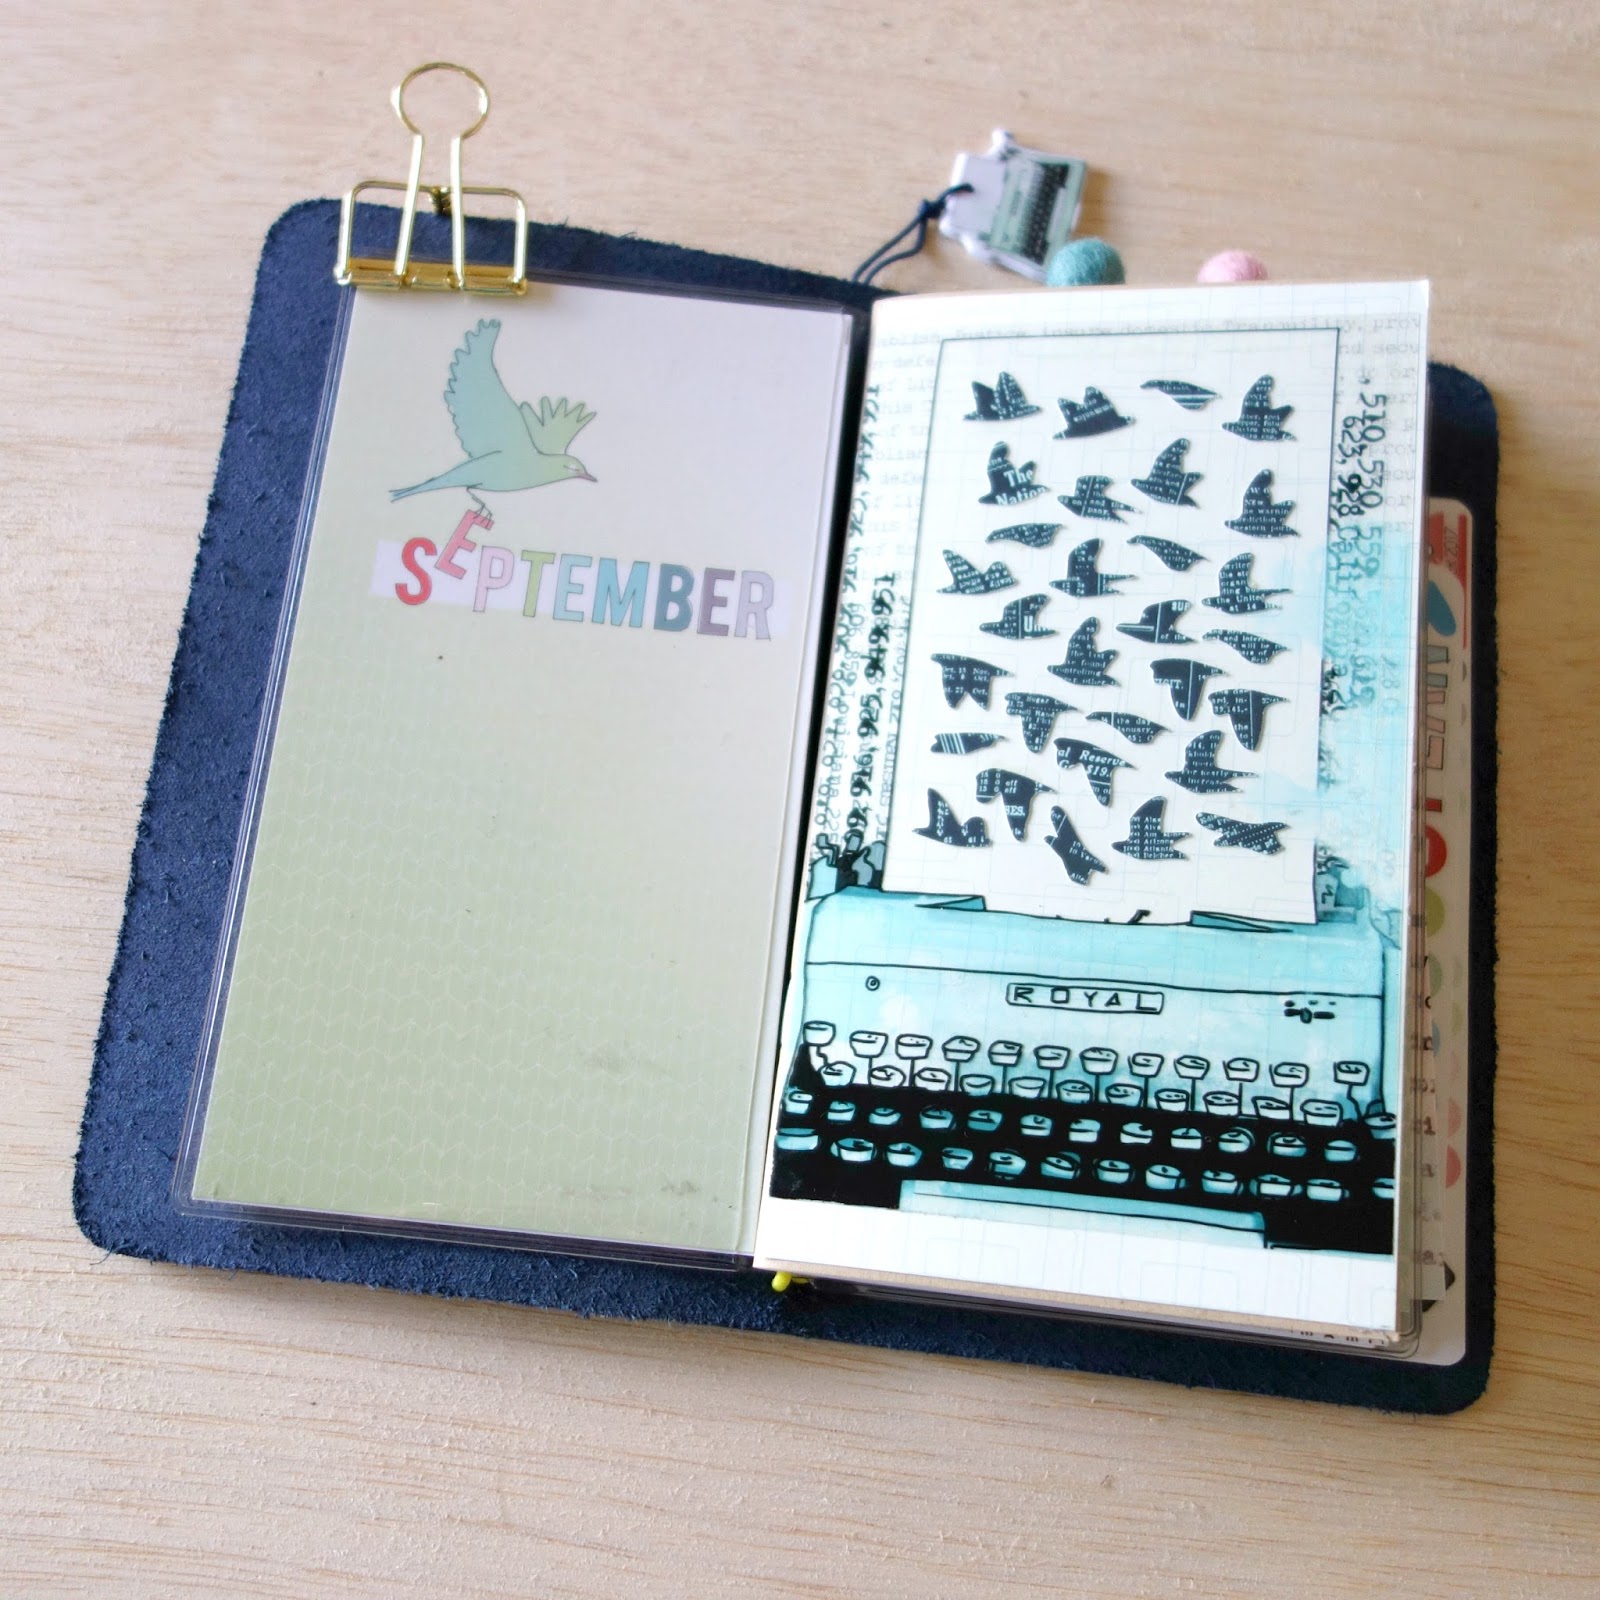
September Planner Setup in foxyfix Boss Babe Kate No. 4 single
As you know I have been planning in a Daisy Dori from Cocoa Daisy since March. And ever since then I have been adjusting my planner system on the quest for planner peace. I have finally come to realize that having planner peace for me means having a system that will easily adjust to my needs. And that it doesn't mean having a fixed setup and layout each and every month. For September I tweaked things a little again and actually filmed two setup videos: My September Planner Setup as well as my September Journal Setup.
I tried having a separate social media insert in August and even though I really like the idea, it made me realize again that I am a "one planner/insert type of girl" - so I merged my daily planning and my social media insert into one. I gained some space in my daily planning insert by putting the weekend days together on one page since I never really plan on those days. This way I was able to have an Instagram list, a budget tracker, an ideas page as well as a monthly catch all to do list in addition to my usual pages: my meal planning and my goals page.
September Journal Setup in foxyfix Botanical Poppy No. 6 single
Even though I really like my monthly journals and how they turn out once they are finished, they are a lot of hard work. I actually stopped Project Life for 2017 because I was so overwhelmed by it and replaced it with the journals thinking this was much easier to do. This is clearly not the case. Creating these weekly memory planning spreads is something I really enjoy doing at the moment but then filling up the rest of the insert is becoming more and more of a struggle. First of all, I think I need to let go of guilt tripping myself when I don't finish an insert, having blank pages is not a failure. Then I need to rethink my approach: maybe printing larger pictures will do the trick or adding a quote, a beautiful card or adding more ephemera will also help. I am already thinking about my plans for 2018 ... right now, they are very frightening because I would move out of a traveler's notebook for memory keeping. *shock* I'm not ready yet to let go but I'm thinking about it. Here is my Journal Setup for September:
August 17, 2017
Planning in the Summer?! And what happened after.
Today I have a blogpost for you that was published on the Cocoa Daisy blog in June. Now, why do I make you read (parts of) this post now? In the middle of August? Because it didn't stop there!
"It’s Simone again with a blogpost for you that is very near and dear to me. As you know, I love having a pretty planner but even more so, I want my planner to work for me. Last year I had my very first planner crisis during June when we had family visiting from Germany and the kids being home from school. I didn’t have the time, energy or desire to use my DaisyDori insert and so it was mostly blank. I started feeling guilty because I didn’t use it and then actually cancelled my subscription because of that."
"This year I wanted to approach things differently. I had already learned that what works perfectly well one month doesn’t necessarily work the next. Earlier this year I came to the insight that yes indeed, with a system as open as the Daisy Dori I do not have to plan the same each and every month. I can totally adapt the layout and setup of my pages as I need them to be. So for June I decided to completely abandon the daily planning in a personal size Daisy Dori and plan and journal in a standard Daisy Dori instead. I am using the first part of the DaisyDori with the sectioned grid pages for a calendar with one week on two pages. The rest of the Daisy Dori is left for journaling. If you want to see what I prepared beforehand here is my June Planner Setup on youtube."
"My plan was to fill the first part of the Daisy Dori with little snippets of life. So that’s what I did: with black ink and stamps I added in our plans for the day and then I used stickers and washi tape (mostly from the Planner kit, Planner Addon as well as the DITL kit) to embellish the day."
Since the weekly spreads take up part of the Daisy Dori, filling the rest of the insert wasn't as hard as it was before. In June I used the rest for the highlights of our time spent with my parents. It turned out so great, here is a link to the Journal Share.
In July I did the same thing as in June: weekly memory planner spreads. And the rest of the Daisy Dori was filled with prompts from challenges, lists, tidbits and our everyday summer life. I just finished it this weekend and will be sharing more next Tuesday on my youtube channel.
My original plan was to go back to my usual planning style in August, but I had so much fun with the weekly spreads that I decided to keep on making them. This has led to minimal decorating in my personal Daisy Dori which is absolutely great because I seem to be more productive with a very linear planning structure. I have already made a list on how I can optimize my planner even more in September and I am looking forward to all the weekly spreads I can decorate in the coming months. I just finished the first one for August, here is the process video.
August 7, 2017
Studio Tour No. 1: My Planner Station
In May I was on the Cocoa Daisy Blog with my take on a Studio Tour. Yes, it is not a real Studio Tour because I actually don't have my own designated studio space. The only thing that I have is part of our kitchen pantry, a raskog cart from IKEA and a wooden planner station in our family dining room. And this is exactly what I am going to share with you today!
When we first moved here I was very sad that I had to give up my studio: I had been sewing and crafting in there all day everyday for the past six years before the move and now I would only have a dining room table and all of my supplies stored in various places throughout the house. But after we had been here for several months and the boxes had been unpacked and this house had become more of a home I started to enjoy creating at the dining room table.
Over time, I was able to set up a raskog cart with all of my tools and items I need all the time. And just recently, I moved this unused wooden box that I brought from Germany and had been using for Project Life into the built in cabinet and set it up as a planner station. Right next to it, I also keep my journaling pouch that I set up for Doris Sander's Journaling Challenge as well as my pencil pouch.
When I plan or journal in my DaisyDori I often take the box and place it right in front of me on the table so I have all the gorgeous Cocoa Daisy planner items right there. I have a video for you where I walk you through the station and talk a bit more about my "studio space".
Finally, this is where I keep all of my scrapbooking and crafting supplies. The right side of the pantry is all mine: in the cabinets on the bottom I keep my papers and projects in IRIS containers and all of my stickers and embellishments in various containers. The top left cabinet houses all of my mixed media supplies and the top right cabinet is home to journals, inserts, my old camera and refills for my Canon Selphy. On the countertop, I store my current projects, my large guillotine trimmer, all of my stamps as well as an IKEA box (Tjena) with my DITL cards.
If you ask me now I will tell you that I really like my studio space just the way it is: I need to clean up after myself every time I create, so I will never have a desk that doesn't have space for me to be creative. And I also really like that I have to create project kits, this makes creating a project so much easier and faster. And lastly, as much as I was annoyed at my pantry space in the beginning, I really love that I can sneak in the pantry while cooking and work on a project.
Thanks so much for taking the time out of your day and reading my little "I don't have a studio" story. Now, please share your studio setup in the comments below: Do you have your own space? Or do you also create in the family space? And do you like it? Or what would you love to change?
When we first moved here I was very sad that I had to give up my studio: I had been sewing and crafting in there all day everyday for the past six years before the move and now I would only have a dining room table and all of my supplies stored in various places throughout the house. But after we had been here for several months and the boxes had been unpacked and this house had become more of a home I started to enjoy creating at the dining room table.
Over time, I was able to set up a raskog cart with all of my tools and items I need all the time. And just recently, I moved this unused wooden box that I brought from Germany and had been using for Project Life into the built in cabinet and set it up as a planner station. Right next to it, I also keep my journaling pouch that I set up for Doris Sander's Journaling Challenge as well as my pencil pouch.
When I plan or journal in my DaisyDori I often take the box and place it right in front of me on the table so I have all the gorgeous Cocoa Daisy planner items right there. I have a video for you where I walk you through the station and talk a bit more about my "studio space".
Finally, this is where I keep all of my scrapbooking and crafting supplies. The right side of the pantry is all mine: in the cabinets on the bottom I keep my papers and projects in IRIS containers and all of my stickers and embellishments in various containers. The top left cabinet houses all of my mixed media supplies and the top right cabinet is home to journals, inserts, my old camera and refills for my Canon Selphy. On the countertop, I store my current projects, my large guillotine trimmer, all of my stamps as well as an IKEA box (Tjena) with my DITL cards.
If you ask me now I will tell you that I really like my studio space just the way it is: I need to clean up after myself every time I create, so I will never have a desk that doesn't have space for me to be creative. And I also really like that I have to create project kits, this makes creating a project so much easier and faster. And lastly, as much as I was annoyed at my pantry space in the beginning, I really love that I can sneak in the pantry while cooking and work on a project.
Thanks so much for taking the time out of your day and reading my little "I don't have a studio" story. Now, please share your studio setup in the comments below: Do you have your own space? Or do you also create in the family space? And do you like it? Or what would you love to change?
April 19, 2017
Cocoa Daisy: April Planner Setup.

I was on the Cocoa Daisy Blog last week, sharing my April Planner Setup. Here it is:
In April I switched from a standard size TN (= traveler's notebook) to a personal size. I have four inserts in my TN: a folder, the April DaisyDori, a monthly insert and a bullet journal insert.
When I made the folder I filmed the process. If you want you want to follow along, this is what you need: cardstock and/or patterned paper and a page protector. I sewed along the edges but you can easily swap the sewing out for washi tape. You can find the video on my youtube channel here: Making a folder with pouch and clear pockets.

I even repurposed the packaging from the Planner Addon kit. My initial idea was to have a place for my dashboard and the Cocoa Daisy Planner stickers. However, the stickers had about 1 cm overhang, so I put them in the pocket in the front of my TN.

Then I decorated the cover of my April DaisyDori with a Cocoa Daisy dashboard, some exclusive paper, the April sticker from the sticker sheet and this beautiful puffy butterfly sticker. Yes, I know: there is a huge contrast between my colorful, mixed media-rish dashboard in the front and this very clean and simple cover. That is exactly the way I like it! This photo is a bit older that is why the DaisyDori is sandwiched in the folder. I have since moved the DaisyDori to its own elastic because it was moving a lot when I wrote in it. That bugged me. A lot.

Before I'll move on to roughly show you what I use the other two inserts for, I want to give you a closer look at my DaisyDori setup. I am using the monthly calendar to record my step count in April and if this works out, I might continue to do so in the following months.

Then on the first two pages I have -and always had ever since I started using the DaisyDori- my meal plan for the whole month on one side and on the other my monthly goals. This month I chose three because it is Baseball season and two of my sons play. So I am very busy and don't want to overwhelm myself with too many goals. I have learned this the hard way and put myself up to failure last spring.

One of my goals is getting back into a cleaning routine. I have had times when I cleaned the whole house in one day and it worked well but since starting my youtube channel, creating for Design Teams and volunteering a lot at our elementary school, I didn't want another full day blocked and not having time to be creative. So I am trying to clean one room each day, leaving Saturdays for Baseball and reserving Sundays to supervise the kids when they do their chores. To keep track of my success I cut down one of the weekly pages from the personal planner pages to fit into one of my folder pockets. I added a tab and a "clean" sticker and can now check off each week. I really like to have this separate so I can check my progress after the month. Since this is not a routine yet, I make sure to add it to my daily to do list as well.

I use the rest of the DaisyDori as a daily planner. The DaisyDori has 36 pages, minus the first and last page and minus the two pages I use for meal planning and goals, this leaves 32 pages to be used. I don't pay any attention to the page design, some of my daily pages are divided in sections and have a grid, some are lined, some are blank and some are sectioned. Since April has 30 days I will end up with two spare pages in the back. I haven't thought about a use for them yet. But I am also not concerned if they will be left blank.

Here is a look at my MO2P (=month on two pages) in my monthly insert. When I used the DaisyDori in standard size for March, I actually used the calendar in the front. In my monthly spread I indicate birthdays, doctor's appointments, lunch dates, school breaks and any other activities that aren't reoccuring.

Finally, the last insert in my TN is this bullet journal insert. This is where I house all of my lists and collections that I want to keep separate from my daily and monthly planning, mostly because I need to refer back to them all year. Since I just moved from a standard size TN to this personal size, I still need to move some of my lists.
In case you want to find out more about me, here is how I introduced myself on the Cocoa Daisy Planner Fans Facebook group: Introduction. I have been subscribed to the DaisyDori since January 2016 and if you want to see how I started my DaisyDori journey, I am sharing them on my youtube channel here: Throwback Thursday * Planning 2016.
Thank you so much for taking some time out of your day to read about my April planner setup, I hope I was able to inspire you to get creative. If you want to know more about my change to a personal size Traveler's Notebook or how I use my standard size DaisyDori, make sure you check out my youtube channel and follow me on instagram.
March 18, 2017
Cocoa Daisy Saturday Seminar: A5 sticker sheet.
Today for our Saturday Seminars in the Cocoa Daisy Planner Fans group, we talked about the A5 sticker sheet. This is a tricky sheet for me both in size and in the way I use it: the size only fits into my standard size traveler's notebook if I cut or fold it in half. I usually fold it right underneath the tab stickers, then I'll only have to use one sticker right away and there is no damage happening to any other stickers. The stickers itself are a mixture of both: functional stickers and pretty stickers. And this is where the problem occurs, I usually use the functional stickers very quickly but have a hard time using the pretty stickers. I tend to hoard pretty things instead of using them and have just recently started to force myself to use all the things. In my opinion, I have been doing very good so far in March, there are a lot of stickers already used. But there have been months where I haven't used a single sticker.
I'll start with showing you how I used the two top stickers: they are always to rectangular stickers, one with the month printed on it and one label. Putting the monthly label on the cover of my insert is something I have been doing almost every time I got my hands on this sticker sheet. The clear label I used this month to note my stats for youtube and instagram on the first. I also used one of the little hearts right next to the label to emphasize the milestone. Yes, I have actually reached 1000 youtube-subscribers at the end of February!
These next to photos show how I often use the tab stickers - for decoration on my pages. I hate it when my tabs are too floppy which is often the case with these sticker labels. So I tend to use them for decorating and layering. For this I cut them apart in the middle. In both cases here, I actually added text into the tab, but there have been numerous times when I simply covered the tab with a die cut or another sticker. In the right photo you can also see two more stickers from this sticker sheet: I added the small arrow from the "flag and arrow" stickers to the tab embellishment cluster making it quite clear that it was Theo's birthday. And since this is indeed a very important day, I also used the corresponding sticker at the top of the page.
Every month the sticker shapes are the same on this sticker sheet but the design and the words are different. In the past I have really struggled when I tried to use these quarter circle stickers on my pages. But this month they fit perfectly as appointment reminders. I hope to use the rest of them as well and try to keep going in April. The flags from the "flag and arrows" were equally hard for me to use: I always need some kind of edge to place them and never thought outside the box enough. So -in my mind- I only had the top of the page and they never worked there. But by simply drawing a box or a line or adding some washi for the sticker to rest, I can now place this sticker anywhere on the page.
This month the arrows were stickers indicating a specific event like the start of daylight savings time or St. Patrick's Day. In the right photo you can see how I used the "hop forward" sticker on March, 12 and then also used the tiny arrows to add the tasks for that day.
Are you using your stickers? Or are you a hoarder like me? After trying really hard to use my stickers and not hoard them since the start of March, I can tell you: it is far more satisfying to use all the things instead of having a growing stash and a slight feeling of guilt. And using pretty things makes me happy!
March 11, 2017
Cocoa Daisy Saturday Seminar: Functional Sticker Sheet.
In the Cocoa Daisy Planner Fans group on facebook we are starting a new series: the Saturday Seminars. In these we are trying to show ways on how we use the product that come in the Cocoa Daisy Planner kits and add-ons. This week we are concentrating on the functional sticker sheet. Lindsey from the planner team has actually listed all the different stickers on her blog, there are 110 stickers on this sheet. I have taken some pictures on how I use them in my planner.
Let's start with a sticker that I had neglected previously: the skinny arrows. There are 8 arrows on the sticker sheet in two color ways. This month I have been using them as arrows to point at important things throughout the day. When I had a list of things I used it to highlight the most important task by highlighting it. I really love that it is so skinny - it doesn't take up too much space which means that the line spacing stays the same. And line spacing is important to this nerdy person.
Moving on to the bullet flags. Four of them are included on every sheet. I use them to make lists, they fit perfectly on the grid section in the inserts and each bullet lines up nicely. Most days my to do list includes more items than four, so I use it on days where I know I can only handle four tasks because the rest of the day is so busy. Or I might divide my tasks into different topics and then use one for chores or video making or kids. This particular day even a sticker didn't help me to get things done, I had to move all four tasks to the next day. Ooops.
Here you can also see how I used the arrow (or as I call them house) stickers. For the afternoon, I marked the two most important things with them. They helped me to space the activities out nicely on the paper. I really am a sucker for a well designed layout - right now, I am using my DaisyDori insert as a daily planner, so each page is one day. The days do not have to be cohesive in their layout but each day's layout needs to be "pleasing to my eye" to work for me. I will do a whole blogpost on how this new setup is working for me, if you are interested, just leave a comment below!
This is another one of the arrows, they differ slightly from the ones above and are included in two sizes on the sticker sheet. You get eight narrow and four wide arrows. I use them very similarly to the arrows above. They would also work well with some writing on them. What I didn't know about them, until just recently, is the fact that they were specifically designed to fit into the date flag stickers. You could mark work days (and hours) or days off or a vacation or other special days like that.
Here is an example on how I used the circle stickers from the sticker sheet. They come in three different sizes, the middle and large circles are two colored. There are six large, six middle and sixteen circles in total. I often use the smallest size to mark out different activities or appointments that I have to remember. But I haven't really used the other two sizes, so I tried to use them and here are two examples. In the photo above I used the circle sticker to highlight a stamp. I partially stamped onto the circle. This way the stamp was more visible and prominent on the page. I also used it to note my stats and fit the word "STATS" into the circle.
I mostly struggle with the word stickers, there are thirteen on the sheet and they all have different words on them. I have only used two of them this month. One can be found in the picture above: I used it to mark the start of the weekend and simply added "Yay, it's the" in my handwriting. The other one was used to mark grocery shopping - one picture above this one. I guess, I need to be a little more creative next week to get them used up by the end of the month!
Yes, I really do want to use up most of my kits every month, I am trying very hard to use the things I love instead of hoarding them. I am a hoarder by nature, always thinking there might be a better opportunity to use a sticker, paper or embellishment. It might sound strange but this for me is "living in the now". Enjoying pretty (and functional) planner things now and not waiting for the perfect moment. It is a very satisfying feeling when I put these things to good use and I love it!
March 7, 2017
Cocoa Daisy Planner Team: Introduction
Each member of the Cocoa Daisy Planner Team is introducing themselves in the Cocoa Daisy Planner Fans facebook group this month. Today is my turn to introduce myself but I feel like I have so much to tell. I hope you'll make it to the end. My name is Simone, I am German living in the Bay Area with my husband and three sons. We moved here only 1.5 years ago, but have adjusted pretty well.
I have been crafting ever since I was little because my mom was/is a very talented crafter, there are photos where I am weaving, trying to crochet and sew. I collected stationery items when I was in my preteens and I still have that collection. As a paper nerd I had a list book where I would list my favorite foods, my friends, the boys I had a crush on, animals I wanted to have and so on.
I then forgot about my paper obsession for about 10 years when I moved on to fabric and sewed mostly clothing for my sons and me. I returned to paper crafting when I found Project Life in 2014 and then started to watch youtube videos in bulk. And this is how I came across Doris Sander's videos where she shared the DaisyDori. I bought a leftover Dori from a previous month to try and then immediately subscribed.
In August 2016 I actually cancelled my Dori subscription because I felt so guilty not using all the pages and tried different kinds of layouts for planning in a midori insert. Just when I thought I figured it all out, my system started to fall apart and I needed to adjust.
March 2017 is the first month that I am back in a DaisyDori for my planner. I changed to daily pages (so I will definitely use all the pages) which gives me enough room for all my plans, afternoon activities and thoughts. My planning style could be described as functional first, then pretty. I want my planner to work for me first, then I will pretty it up. I am trying to use all the stickers that come in the kit and they help me to visualize more important tasks and create a "layout that is pleasing to the eye."
In January I started to journal/memory keep/scrapbook in a DaisyDori as well. I affectionately call it smashdori (which is a word by Arleigh, the designer of the pretty planner things from Cocoa Daisy) because it reminds me so much of smashbooking. I thought this was something new, but I just pulled out my old journal from 1991 (that is 26 years ago) and it looks less colorful but the tendencies are there. So maybe this is something that is very natural to me.
****
See, I told you this was going to be long. But I still want to add three random facts about me:
1. I am the oldest of five children.
2. After I became obsessed with sewing, my mom got back into this hobby as well and actually opened a fabric store several years ago at age 58.
3. My husband and I are high school sweethearts and have been together for 21 years.
****
My social media:
youtube: https://www.youtube.com/c/seemownay
instagram: https://www.instagram.com/seemownay/
February 27, 2017
Planning in a Traveler's Notebook: Planner Struggle & March Setup.
If you follow me closely on my other social media like instagram or youtube, the things I am going to tell you now, might be old news to you. But if not, here it goes.
For the past several weeks I have been struggling to use my planner, I didn't have enough room to actually make it work as a functional planner, add some pretty embellishments and at the same time be still pleasing to the eye. I also used to carry my planner everywhere but had started to leave it at home because it was too bulky and heavy. Add to that the fact that some of my additional traveler's notebook covers didn't work as planned. It was time to face the inevitable: the way I had sought out to plan in 2017 in the beginning of January needs to be changed. I filmed a lengthy video about my planner struggles, please check it out here.

My idea is to switch things up completely by using a personal size traveler's notebook starting in April, this should help with the weight and bulkyness. For the month of March, I decided to go back to my Cocoa Daisy insert, the DaisyDori in standard size and try to use one whole page for daily planning. This should address the issue of roominess. Again, I filmed a process and setup for my March DaisyDori, what I didn't expect was that I was completely stumped when it came to the layout of the daily pages. So I decided to take it one step at a time and only prepare the first couple of days and then move forward from there.
And finally, the last thing I wanted to share is by far the most exciting: I have been chosen to be on the Cocoa Daisy Day Planner Team for 2017. Alongside other lovely ladies I will be sharing my planning and memory keeping process with their products and hope to be inspiring to you all!
November 3, 2016
Planning in a Traveler's Notebook: October Review and November Setup
I would have never thought that I needed a monthly overview, but when I decided last month that I wouldn't use it, I actually went back and filled it in about 5 days into October. So this month I made sure I filled in all the events and get a good feeling for the month.
How do I utilize the monthly overview? I mark birthdays, holidays, school breaks. I add appointments, regular activities (in the mornings) and events. I do not need exact times because I don't use it for accurate planning. As I said before: the monthly overview gives me a feeling for the month, this is where I can find out if my goals align with the ongoing events. This is where I notice: "Shoot, THIS is actually November, if I want my kids to have an adventcalendar by December 1st, I have to do it BEFORE that day." Or: "I am reading in the classroom on Friday, there is two other appointments in the mornings that week, don't plan on getting any crafty time in." Or: "If I want to send a postcard for that birthday, I need to send it by that date because it takes a week to get there."
Are you using a monthly overview in your planner? And if so, how are you using it? If you want to see what my October planner pages looked like and see how I decorated Novembers planner spread, here is a video.
October 21, 2016
Planning in a Traveler's Notebook: What is in my Fabric Dori.
October 6, 2016
Planning in a Traveler's Notebook: What is in my Midori.
I have posted a video on youtube where I briefly show you my planners and walk you through my Midori Traveler's Notebook. I mainly use it as a calendar on a daily basis. If you want to take a look, here it is:
September 29, 2016
Planning in a Traveler's Notebook: September flip and October setup
I have a new video up on my youtube channel where I show you what my September looked like. How successful I was in reaching my goals and what I liked and didn't like about the calendar pages I used. I will be changing up my weekly spreads in October because I want to find out what works best for me.
I am also trying out what kind of videos I like to make, what I am comfortable with and that is why I will only be sharing one Plan with me video in October - making these videos is very time consuming and doesn't leave much room for anything else. So before I am committing to a specific type of video on my channel I want to try them all. Please bear with me. I have started filming shares of my Project Life Album for 2016 and would like to make a series to catch up on my album. I am still stuck in May. I hope to start this Saturday, so stay tuned.
September 19, 2016
Plan with me: Week 38
I'm just popping in to let you know that I have yet another "plan with me" video up on my youtube channel! I really like the way my Mondays start to take shape: the first thing I do after everybody left the house is setting up my filming station and then decorating and planning my week. Then I do the meal plan and shopping list and off I go to go grocery shopping. After I get back, I have lunch and in my lunch break I edit and upload the video to youtube. It's a tight schedule but it's something I enjoy doing.
September 12, 2016
Plan with me: Week 37.
I don't know about you, but I really love watching youtube videos while doing chores or cooking dinner. That is how I found plan with me videos - people showing their decorating and/or planning process on video. I have been watching youtube since the end of 2014 and always wanted to give back to this awesome community. Scrapbooking videos felt so daunting and when I started decorating my planner (yes, I never thought I would do that), I felt that making process videos about my weekly planning process was something I could manage. Sort of like: starting out slowly.
So I have been filming my process for the last weeks and hopefully learned a lot every time I edited, voiced over and uploaded a video. This is already my 4th weekly plan with me. If you want to check it out, please follow the link. And if you like what you see there is even more: Plan with me. Week 35. And last week's video: Plan with me. Week 36.
August 22, 2016
Plan with me: Week 34
I am rocking it. At least for now. I would so love to continually put out content on my blog and youtube channel. This is why the Supergirl was stuck in my planner. If you want to see how I plan, I did a plan with me video last Friday and just added some photos to the end. I hope to do one every week so I will show you how the week turned out next Monday.
January 18, 2016
My new Midori Travelers Notebook.
Today I want to show you what I got to help me reach my ambitious goals. As you might know, I have become a youtube-addict watching all sorts of scrapbooking, organizing, planner and crafting videos, right now I am obsessed with hobonichi, watercolor and handlettering. So in the fall, I found the Midori Travelers Notebook along with Cocoa Daisy's Daisy Dori inserts and was very intrigued. I liked everyting about it: the size, the possibility to have different notebooks kept together by a cover, and the design. Since I didn't want to spend a lot of money on something I wasn't sure I would really use, I made a "fauxdori" out of fabric and bought one Daisy Dori insert to use it for the month of December. It worked better than all of the planners and apps that I used before. So I put it on my Christmas list and and Santa brought me one!
****DEUTSCHE VERSION****
Heute möchte ich Euch zeigen, mit welchem Hilfsmittel ich versuche in diesem Jahr meine hochgesteckten Ziele zu erreichen. Wie ihr sicherlich wisst, schaue ich wahnsinnig gerne youtube videos: angefangen habe ich mit scrapbooking videos, zur Zeit schaue ich gerne Videos über Hobonichi, Aquarellmalen und Handlettering. Im Herbst bin ich auf Midori Traveler Notebooks und Daisy Dori Inserts von Cocoa Daisy gestoßen und war ziemlich begeistert. Mir gefiel die Größe, die Möglichkeit verschiedene Hefte in einer Hülle zu kombinieren und natürlich das Design. Weil ich nicht gleich viel Geld für etwas ausgeben wollte, von dem ich nicht wusste, ob ich es wirklich benutzen würde, habe ich mir erstmal ein "fauxdori" aus Stoff genäht und ein Cocoa Daisy Insert bestellt um es im Dezember zu benutzen. Das hat super funktioniert, besser als alle Planner und Apps, die ich bisher schon ausprobiert hatte. Also habe ich mir zu Weihnachten ein Midori Travelers Notebook gewünscht und bekommen!****
So this is a small tour of my Midori, the Daisy Dori insert and some info about how I am using it for my planning. I added some beautiful glass beads to the elastic. When I took the pictures I had three inserts in my midori (a monthly calendar, my journal, the December and January inserts), right now I have three in it.
***
Das ist also eine kleine Tour durch meinen Midori, das Daisy Dori insert und ein bisschen Info, wie ich es nutze. Ich habe ein paar schöne Glasperlen an das Gummi gemacht, jetzt gefällt es mir richtig gut. Als ich das Foto gemacht habe, hatte ich vier Inserts in meinem Midori (ein Monatskalender, mein Tagebuch, das Dezember und das Januar-Insert), mittlerweile habe ich nur noch drei Inserts drin.
This is Midori insert No. 017, the undated monthly insert. I use this for my forward planning, birthdays, holidays and to get a quick overview of my month. I have to add that appointments, my children's activities are also in my digital calendar that I share with my husband. Since I start my weeks on Mondays, the undated version works perfect for me.
***
Das ist das Midori Insert Nr. 017, der undatierte monatliche Kalender. Den nutze ich zur Vorausplanung, für Geburtstage, Feiertage und um einen schnellen Überblick über meinen Monat zu bekommen. Allerdings stehen trotzdem alle Termine, Veranstaltungen und Aktivitäten der Kinder in meinem digitalen Kalender, den ich mit meinem Mann teile. Bei mir startet die Woche (schon immer) montags also ist diese undatierte Version perfekt für mich, so kann ich mir das einrichten, wie es für mich funktioniert.
This is my journal, it is a midori insert No. 003, I covered the outside with some scrapbooking paper, washi tape and an embellishment. Inside I journal with a few tip-ins, little decoration and mainly writing. I want to keep this very low key and doable, since I would really love to go back to journaling on a daily basis.
***
Das ist mein Tagebuch, es ist ein Midori Insert Nr. 003, das ich mit etwas Scrapbooking Papier, Washitape und einem Embellishment verziert habe. Das Tagebuch innen ist nur mäßig dekoriert und mit wenigen Fotos, etc. Es soll schnell und einfach gehen, weil ich gerne wieder täglich schreiben möchte und dann muss es machbar sein und nicht total aufwändig, so dass ich es gleich wieder aufgebe.
For stickers and stuff I made a folder from scrapbooking paper. I followed this Tutorial by TheSassyPineapple.
***
Für Aufkleber und Zeug habe ich diese Mappe, nach einer Anleitung von TheSassyPineapple, aus Scrapbooking Papier gemacht.
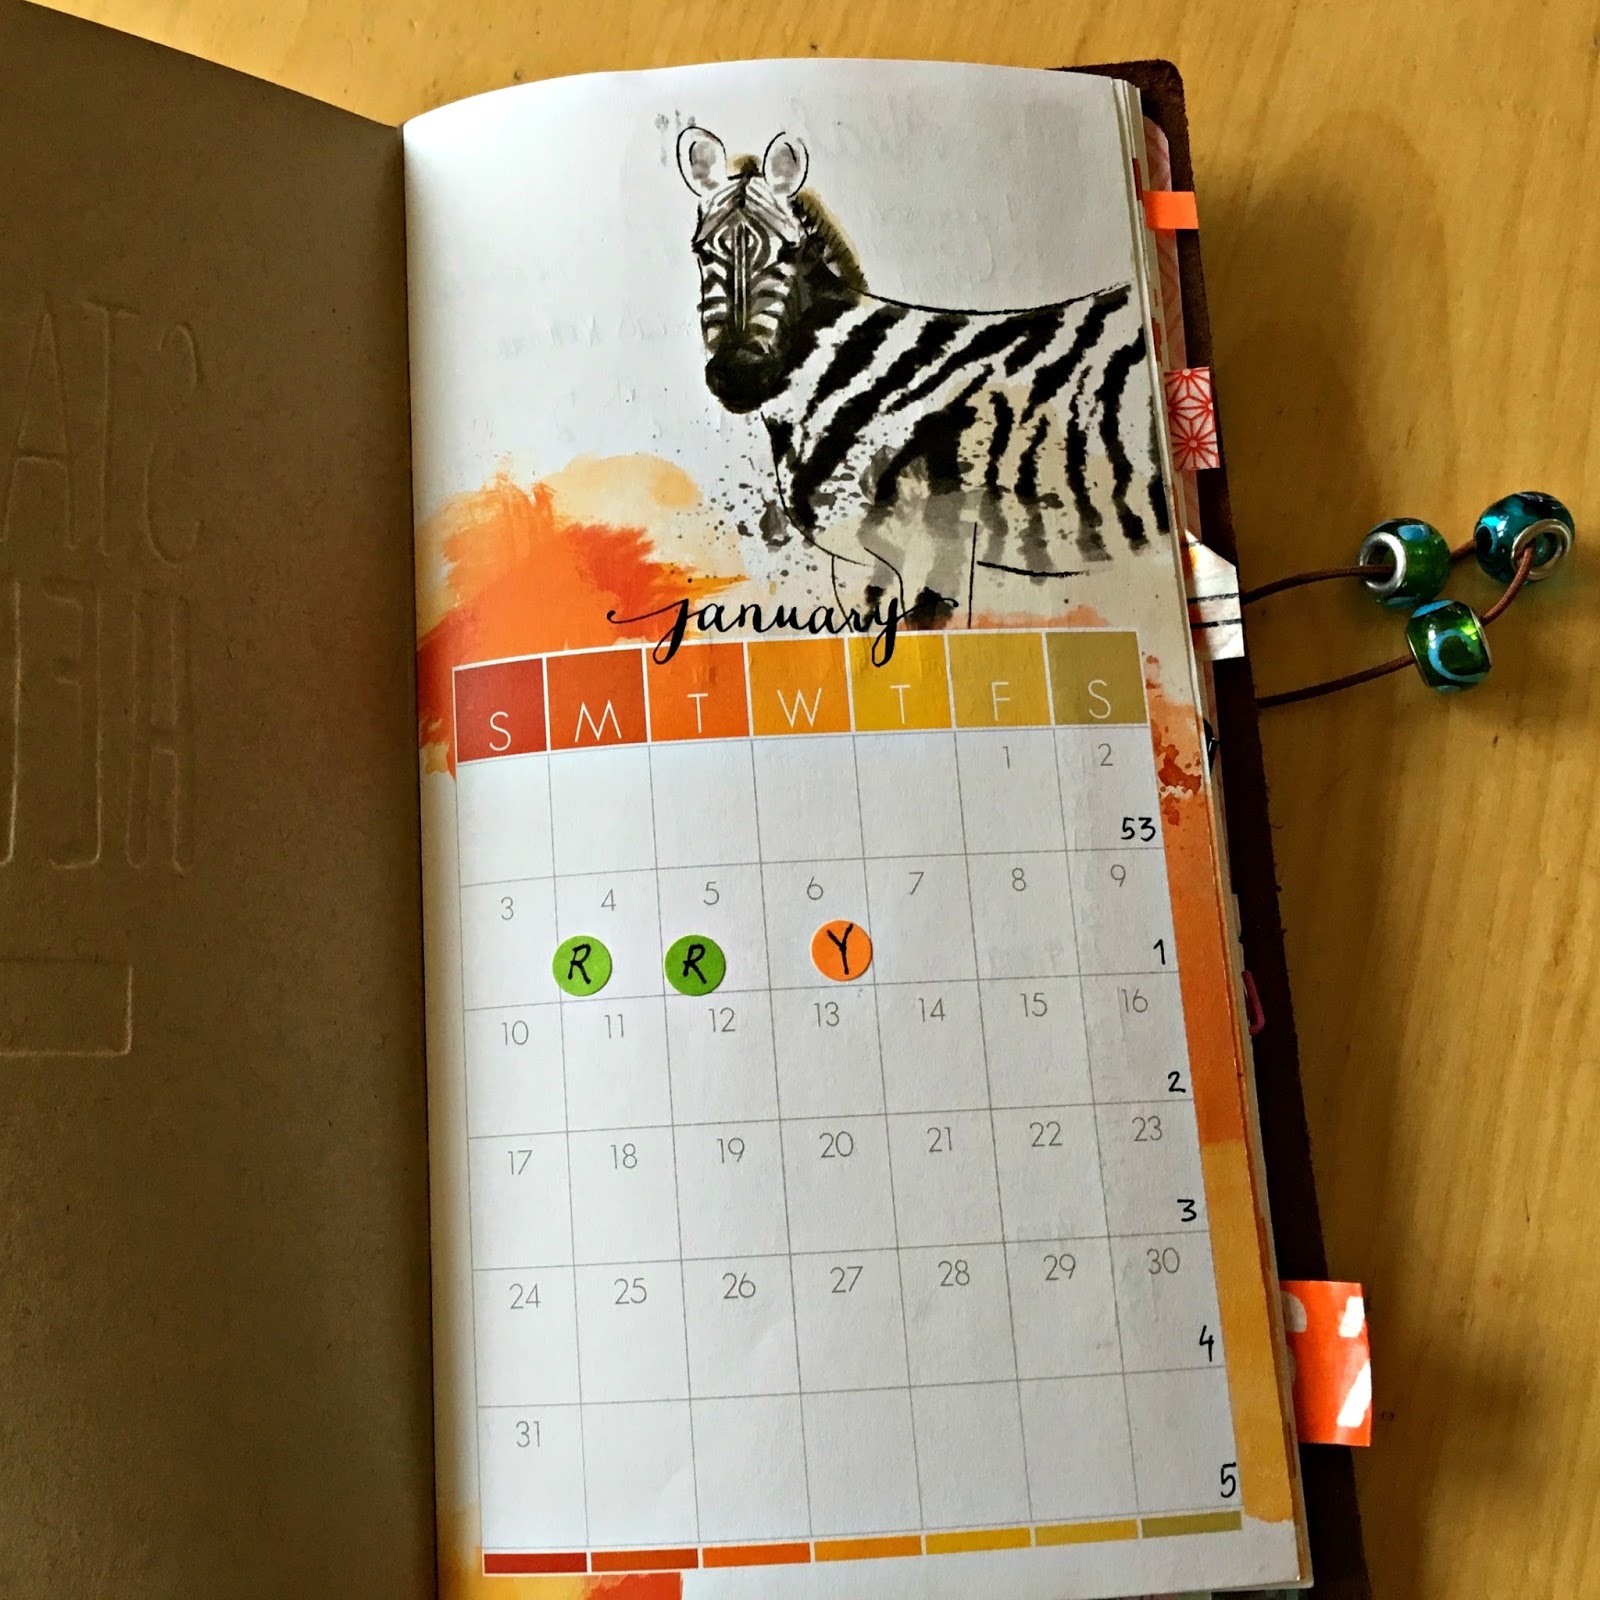
The first page of the Daisy Dori insert is this tiny monthly calendar that I use for tracking: I track my youngest reading and my workouts.
***
Die erste Seite des Daisy Dori Inserts ist dieser kleine Monatskalender, den ich zum Erfassen meiner Ziele nutze: das Lesen üben des Jüngsten und meinen Sport.
The second page I use for meal planning and next to that I write down my goals for the month.
***
Die zweite Seite beinhaltet unseren Speiseplan und daneben befinden sich meine Ziele für den Monat Januar.
Then I break my goals down to weekly goals on the next four pages. I sort them into these categories: cleaning, crafting, blog, mail, kids. Before writing down my goals for week 2 on Sundays, I review week 1 and move over everything that didn't get done or isn't finished yet. The different categories work well for me, they seem to represent the different parts of my life right now.
***
Auf den nächsten vier Seiten konkretisiere ich die Ziele noch einmal für jede Woche und verteile sie in die verschiedenen Kategorien. Die Ziele für Woche 2 schreibe ich meist erst am Sonntag auf, nachdem ich geschaut habe, wie Woche 1 gelaufen ist. Alles was ich noch nicht erledigt habe oder was noch nicht fertig ist, wird in Woche 2 verschoben. Die verschiedenen Kategorien repräsentieren die verschiedenen Teile meines Lebens und funktionieren zur Zeit ganz gut so.
I use one of these double spreads of this design for planning out my blog posts and jotting down ideas.
***
Eine dieser freien Doppelseiten nutze ich um meine Blogposts zu planen und mir Ideen dazu aufzuschreiben.
There are several blank pages in the insert, one of them I use for inspiring quotes that I find during that month.
***
Es gibt einige dieser leeren Seite im Insert, diese hier nutze ich für Sprüche, die mir in diesem Monat über den Weg laufen.
Another one I use for writing down everything I would love to have. I find that when I write everything down, I can start to prioritize, find out what I would really like and prevent a lot of impulse buying. (And there has happened a lot of that during the last couple of months). It is an eyeopener for sure when you review that list frequently and find out how quickly you can cross off a lot of the items on the list. I hope this helps me sticking to my budget.
***
Eine von den anderen freien Seiten nutze ich für meine Wunschliste. Mir ist aufgefallen, dass es mir hilft, mir alle (noch so dämlichen und utopischen) Wünsche aufzuschreiben, um festzustellen was ich wirklich haben möchte und so Impulskäufe zu verhindern. (Und von dieser Sorte gab es in den letzten Monaten schon so einige.) Was ziemlich erschreckend ist, wie schnell ein eben noch dringend benötigtes Teil im nächsten Moment schon wieder von der Liste gestrichen werden kann. Ich hoffe, so kann ich mich besser an user Budget halten.
These pages are where I do my daily planning. I write down appointments and such (more as a reminder to plan my tasks accordingly) in a box and then add my tasks. Each day I review, move and plan tasks for the next day. I usually indicate moving it to the next day with an arrow. I also try to find out why a particular task didn't get done and help by adding a phone number or breaking it further down.
***
Und das sind nun die Seiten auf denen meine tägliche Planung stattfindet. Hier stehen Termine und so in einer Box (nur als Erinnerung, dass ich meinen Tag entsprechend plane) und dann kommt da meine to-do-Liste dazu. Jede Aufgabe wird abgehakt, wenn sie nicht erledigt wurde auf den nächsten Tag verschoben und neue Aufgaben hinzugefügt. Aufgaben, die ich verschiebe, markiere ich mit einem Pfeil. Meist überlege ich noch kurz, warum ich eine bestimmte Aufgabe heute (schon wieder) nicht geschafft habe und unterstütze mich darin, sie beim nächsten Mal zu erledigen, indem ich vielleicht noch eine Telefonnummer raussuche und dazuschreibe oder die Aufgabe in noch kleinere Happen teile.
The last double page is then used for my shopping list for stores that I only visit occasionally and for ideas for the next month, I write down what I would like to sew, what paper projects seem appealing and book recommendations.
That's it. Even if you are not planning or your process is completely different from mine, I hope this was still helpful and you liked reading! Thanks for looking!
***
Die letzte Doppelseite nutze ich dann als Einkaufsliste für Läden, die ich nur selten aufsuche und um meine Ideen für den nächsten Monat festzuhalten, was könnte ich als nächstes nähen, auf welches Papierprojekt habe ich Lust und welche Buchempfehlungen schnappe ich in diesem Monat so auf.
So. Das wars. Auch wenn ihr gar nicht plant oder ganz anders als ich plant, vielleicht war es ja an der ein oder anderen Stelle ganz hilfreich und ihr hattet Spaß beim Lesen! Danke, dass ihr vorbeigeschaut habt!
Subscribe to:
Posts (Atom)